Preserved Flower DIY Tutorials
Step 1: 用小掃或鑷子清除青苔表面的雜質。修短青苔根部營造地形的高底。將青苔剪成半圓形狀 (依照樽底直徑和圓周)
Step 2: 將插花用料發泡膠修剪至青苔高度(略矮),將發泡膠剪成另一半圓形狀, 比圓周少約一厘米。利用熱熔槍與青苔合併
Step 3: 將保鮮青苔覆蓋插花用料發泡膠表面。盡量令青苔企身。
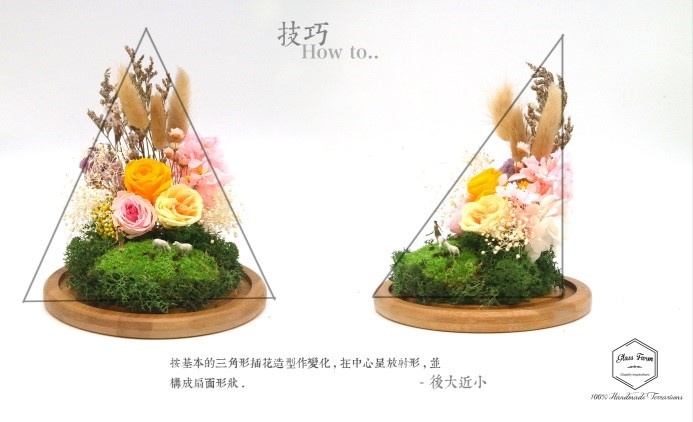
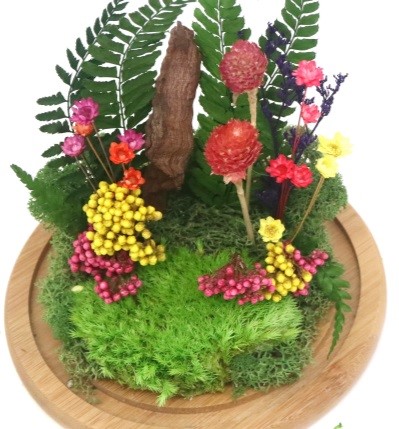
Step 4: 插上乾花和裝飾
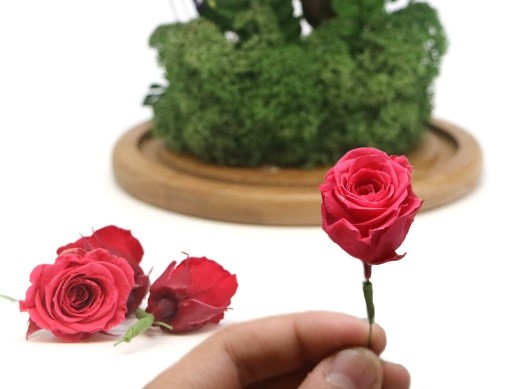
Step 5: 將鐵線小心插進永生玫瑰莖部,利用綠色膠紙覆蓋
Preserved Flower DIY
Step 1: First, use a small brush and tweezers to clean the surface of the moss that give a fresher look to it. Then, cut the roots of the moss in order to create a wanted landscape. Cut the moss into a semi-circle according to the diameter and perimeter of the container.

Step 2: Cut out a piece of dry flower mud that is slightly shorter than your moss in semi-circle as well. (Make sure it is smaller than the moss) Next, use hot glue to stick the mud and moss together.
*TIPS: If you are using a container with flat base, you can always stick the moss and mud on the base as well.
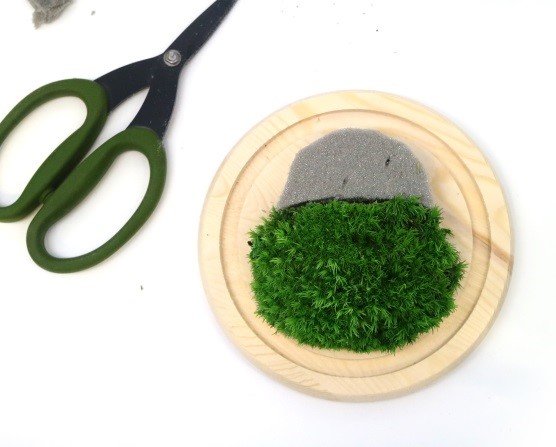
Step 3: Cover the dry flower mud with preserved moss to make it look prettier. Keep in mind it better to make the preserved moss look more dimensional.
*TIPS: Cover the side first, then the top. Use the root part of the preserved moss on the top

Step 4: Now is time to design your very own preserved flower deco. You can now stick in desired dry flowers and other decoration.
*TIPS: Keep your design in the shape of triangle (less on top, more on the bottom).
Step 5: Insert a small piece of wire into the stem of the preserved rose carefully, and use green tape to cover the connected part to prevent the wire slipping down.
*TIPS: You can also add wire to dry flowers and decorations than aren’t strong to be plugged into the mud.
Now you have your one and only Preserved flower deco.